How to add print area: rectangular shape?
To add rectangular print area.
1. Open inkXE Admin.
2. Go to Products in the toolbar towards the left and select Product List from the drop down.
3. The product list will appear towards the right. Select your product.
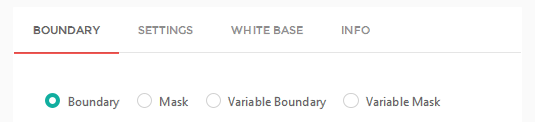
4. In the product page, click Boundary located under Boundary.
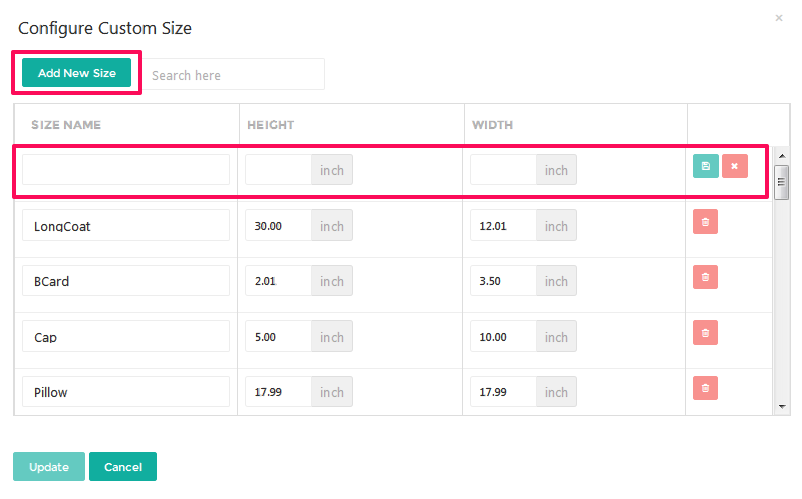
5. A box will appear. Go to Variable Boundary and tap Configure Custom Boundary.6. A popup named Configure Custom Size will open. Click Add New Size.
You have added rectangular print area.7. Set properties, such as, size name, height, and width and click on save icon.8. Close the popup.
Related Articles
How to add print area: rectangular shape? (inkXE Version 8.5.0 onwards)
To add rectangular print area. 1. Open inkXE Admin. 2. Go to Products in the toolbar towards the left and select Product List from the drop down. 3. The product list will appear towards the right. Select your product. 4. Click on Rectangle ...How to add print area: any shape? (inkXE Version 8.5.0 onwards)
NOTE: Supported format is svg. To add print area for any shape, 1. Open inkXE Admin. 2. Go to Products in the toolbar towards the left and select Product List from the drop down. 3. The product list will appear towards the right. Select your ...How to configure print area: irregular shape? (inkXE Version 8.5.0 onwards)
To configure shape printing area for irregular shapes, TIP: Supported format is svg. 1. Open inkXE Admin. 2. Go to Products in the toolbar towards the left and select Product List from the drop down. 3. The product list will appear towards the right. ...How to modify print area: rectangular shape? (inkXE Version 8.5.0 onwards)
To modify rectangular print area. 1. Open inkXE Admin. 2. Go to Products in the toolbar towards the left and select Product List from the drop down. 3. The product list will appear towards the right. Select your product. 4. Click on Rectangle ...How to modify print area: rectangular shape?
To modify rectangular print area. 1. Open inkXE Admin. 2. Go to Products in the toolbar towards the left and select Product List from the drop down. 3. The product list will appear towards the right. Select your product. 4. In the product page, ...