How to set bleed mark? (inkXE Version 8.5.0 onwards)
To set bleed mark,
1. Open inkXE Admin.
2. Go to Products in the toolbar towards the left and select Product List from the drop down.
3. The product list will appear towards the right. Select your product.
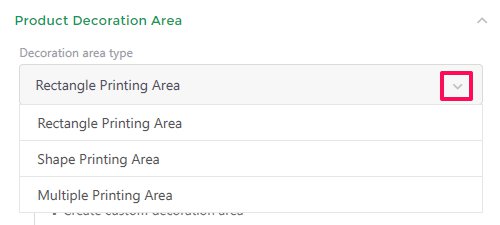
4. Select your desired printing area from the drop-down section of Decoration area type towards the right.
NOTE: You cannot set bleed mark on Multiple Printing Area.
5. Go to the drop-down below and select your desired printing area.6. Enable Bleed Mark option which is at the bottom left.7. A pop up will appear. Enter your values for Crop Mark and Safe Zone.8. Enable both the check boxes.9. Click Save.
You have set bleed mark.
Related Articles
How to set bleed mark? (inkXE Version 5.4.0 onwards)
To set bleed mark, 1. Open inkXE Admin. 2. Go to Products in the toolbar towards the left and select Product List from the drop down. 3. The product list will appear towards the right. Select your product. 4. In the product page, go to Printing ...How to set bleed mark?
To set bleed mark, 1. Open inkXE Admin. 2. Go to Products in the toolbar towards the left and select Product List from the drop down. 3. The product list will appear towards the right. Select your product. 4. In the product page, select Boundary ...How to set border? (inkXE Version 8.5.0 onwards)
To set border, 1. Open inkXE Admin. 2. Go to Products in the toolbar towards the left and select Product List from the drop down. 3. The product list will appear towards the right. Select your product. 4. Click on Rectangle Printing Area from the ...How to set print area: irregular shape? (inkXE Version 8.5.0 onwards)
To set print area of irregular shapes, 1. Open inkXE Admin. 2. Go to Products in the toolbar towards the left and select Product List from the drop down. 3. The product list will appear towards the right. Select your product. 4. Click on Shape ...How to set price for color variants? (inkXE Version 8.5.0 onwards)
To set price for color variants of a product, 1. Open inkXE Admin. 2. Go to Products menu in the toolbar towards the left and select the Product List from the drop-down. 3. The product list will appear towards the right. ...